Yummy Chicken Enchiladas

Titling this post ‘Yummy Chicken Enchiladas’ because that is what our mom called these in the recipe book she gave each of us when we went off to college 😭 So special to have that. It’s for sure my most used recipe book. It has all of our mom’s go-to recipes she’d make growing up, and these chicken enchiladas we are sharing today is one of them. Such a treasure!

pns08087.jpeg

We took photos of these and planned to post the recipe last summer, but never got around to it. What better time to post a new recipe though while everyone is staying home during this Covid-19 pandemic. So crazy to think about what has gone on in the world over the last couple of months!

These enchiladas are not, by any means, healthy (sorry not sorry), but they ARE delicious. They’re packed with so much flavor and are pretty simple to make! Our mom would always serve these with chips and guac and some cut up fruit.

Salty Blondes | Yummy Chicken Enchiladas

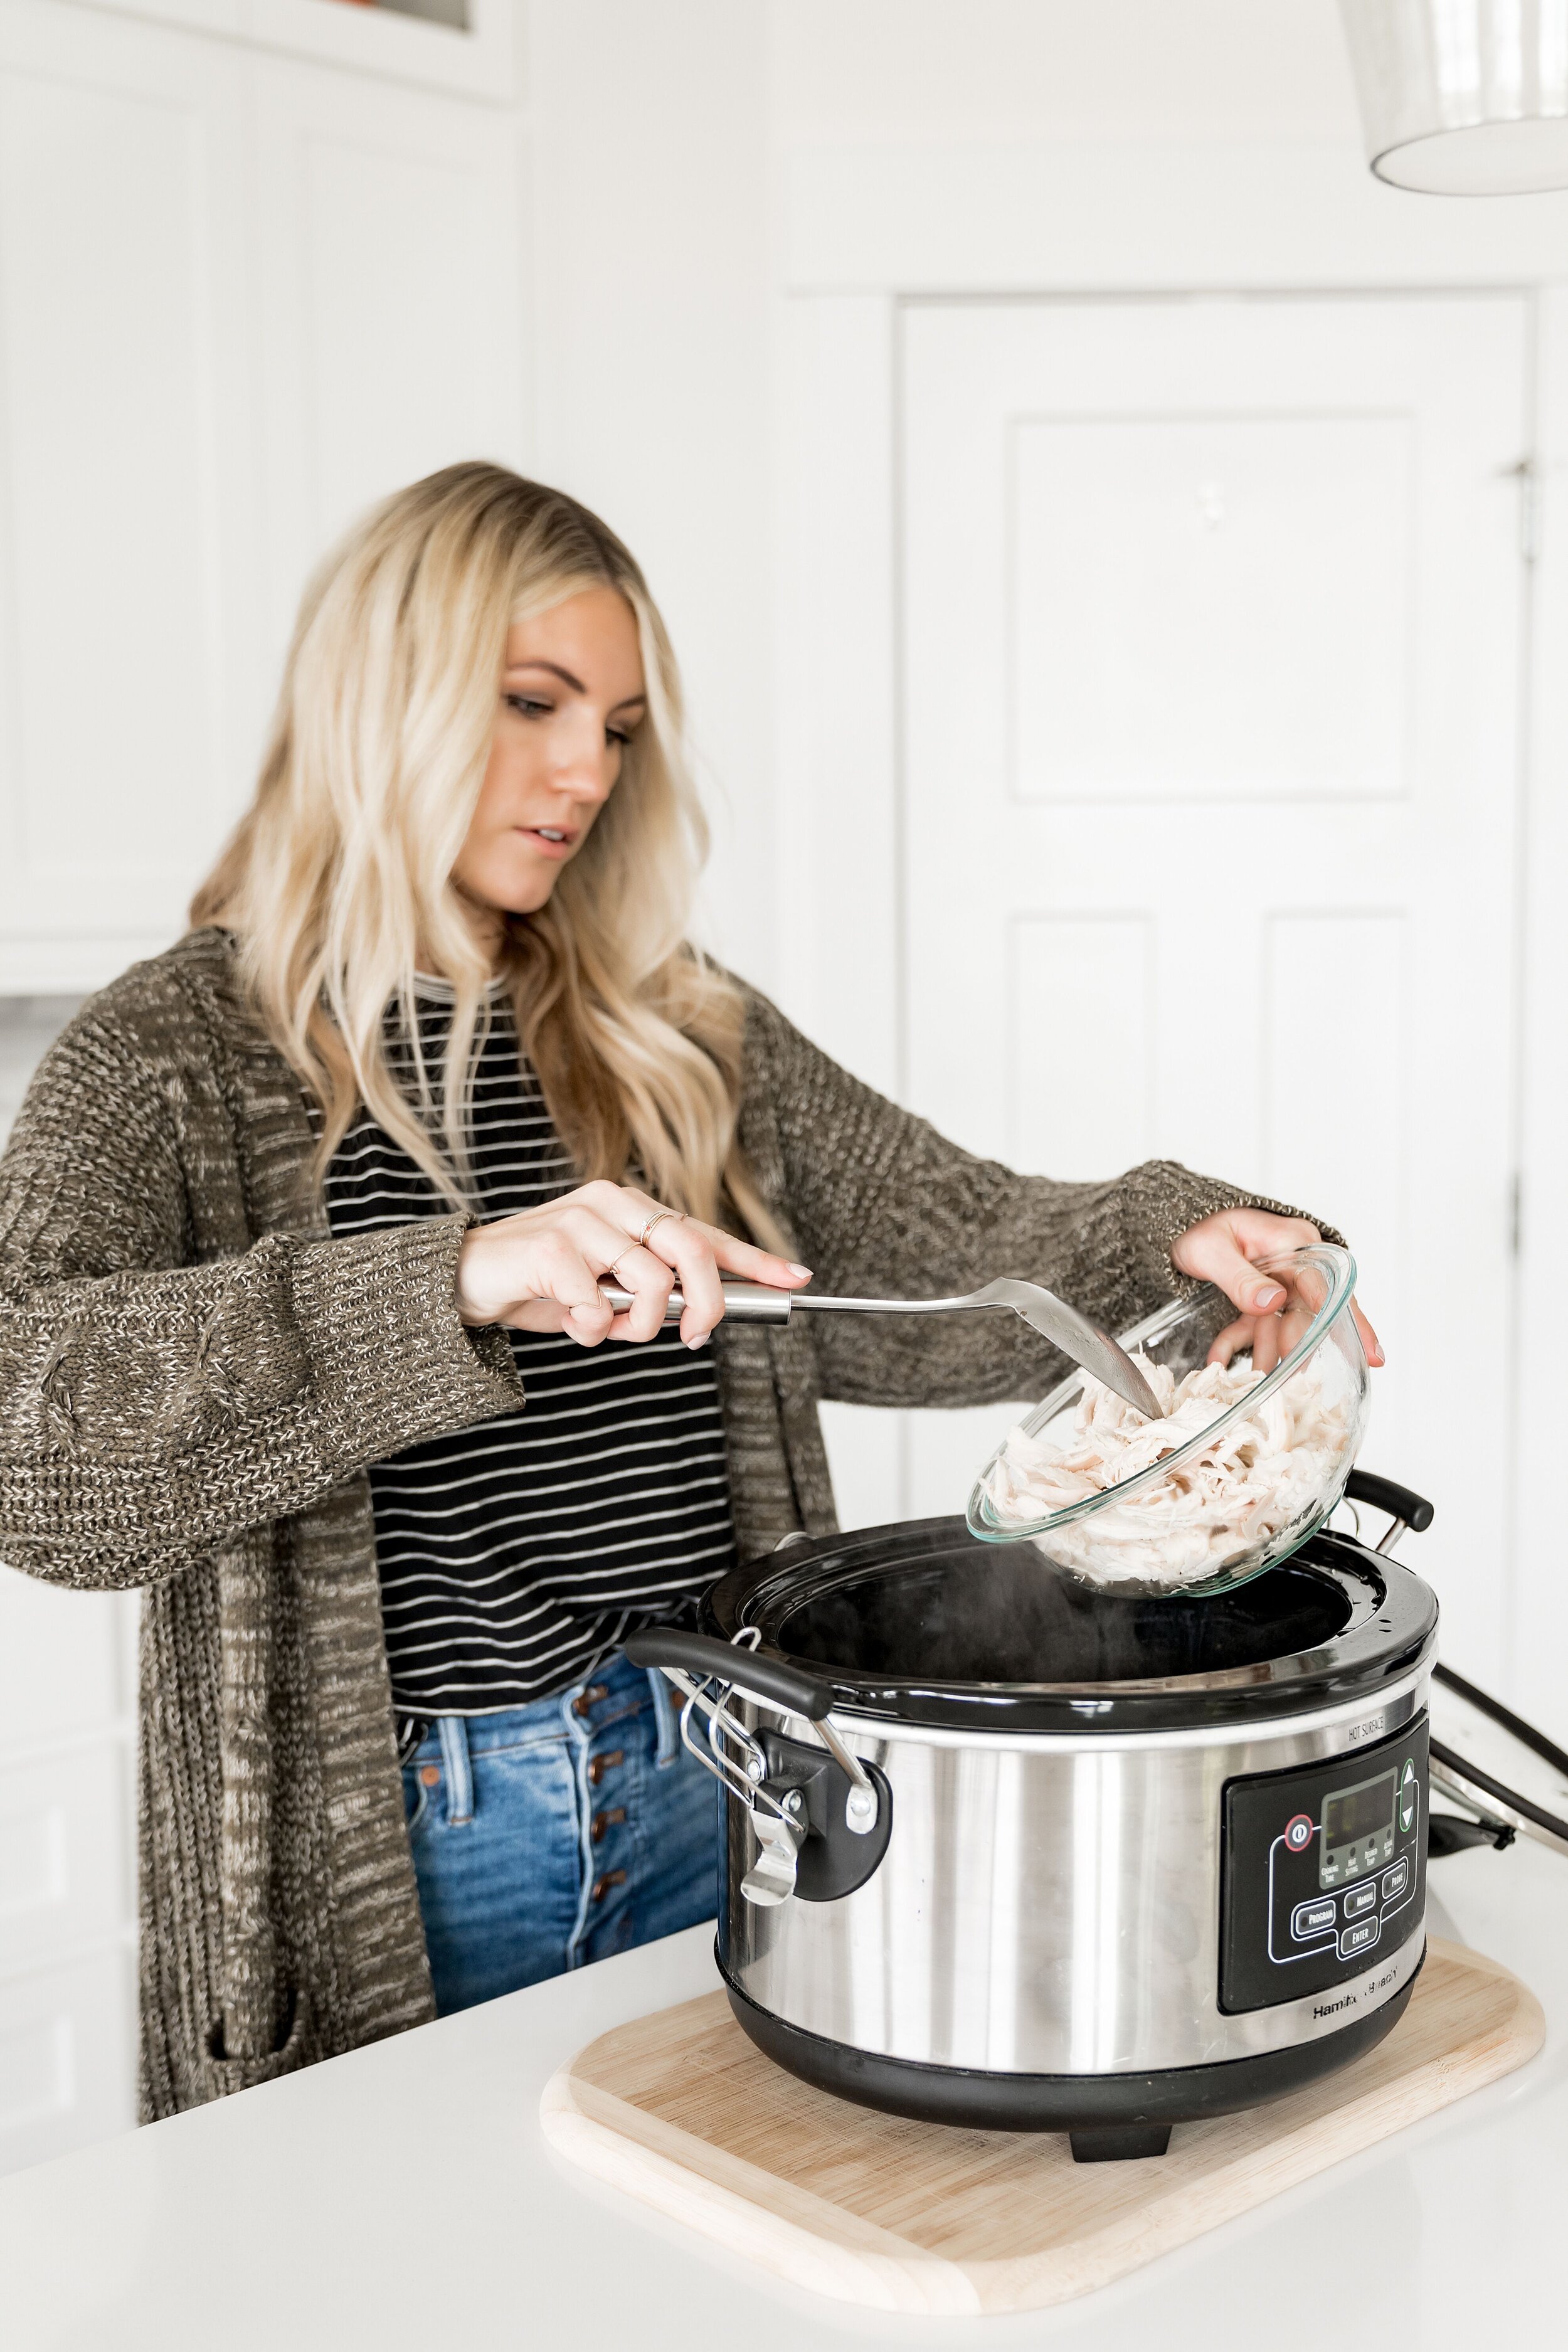
Yes, I am wearing my disposable gloves, haha. It’s easiest to mix up the filling mixture with your hands sometimes, and I prefer to wear cloves when prepping messing mixtures. Sue me!

Salty Blondes | Yummy Chicken Enchiladas

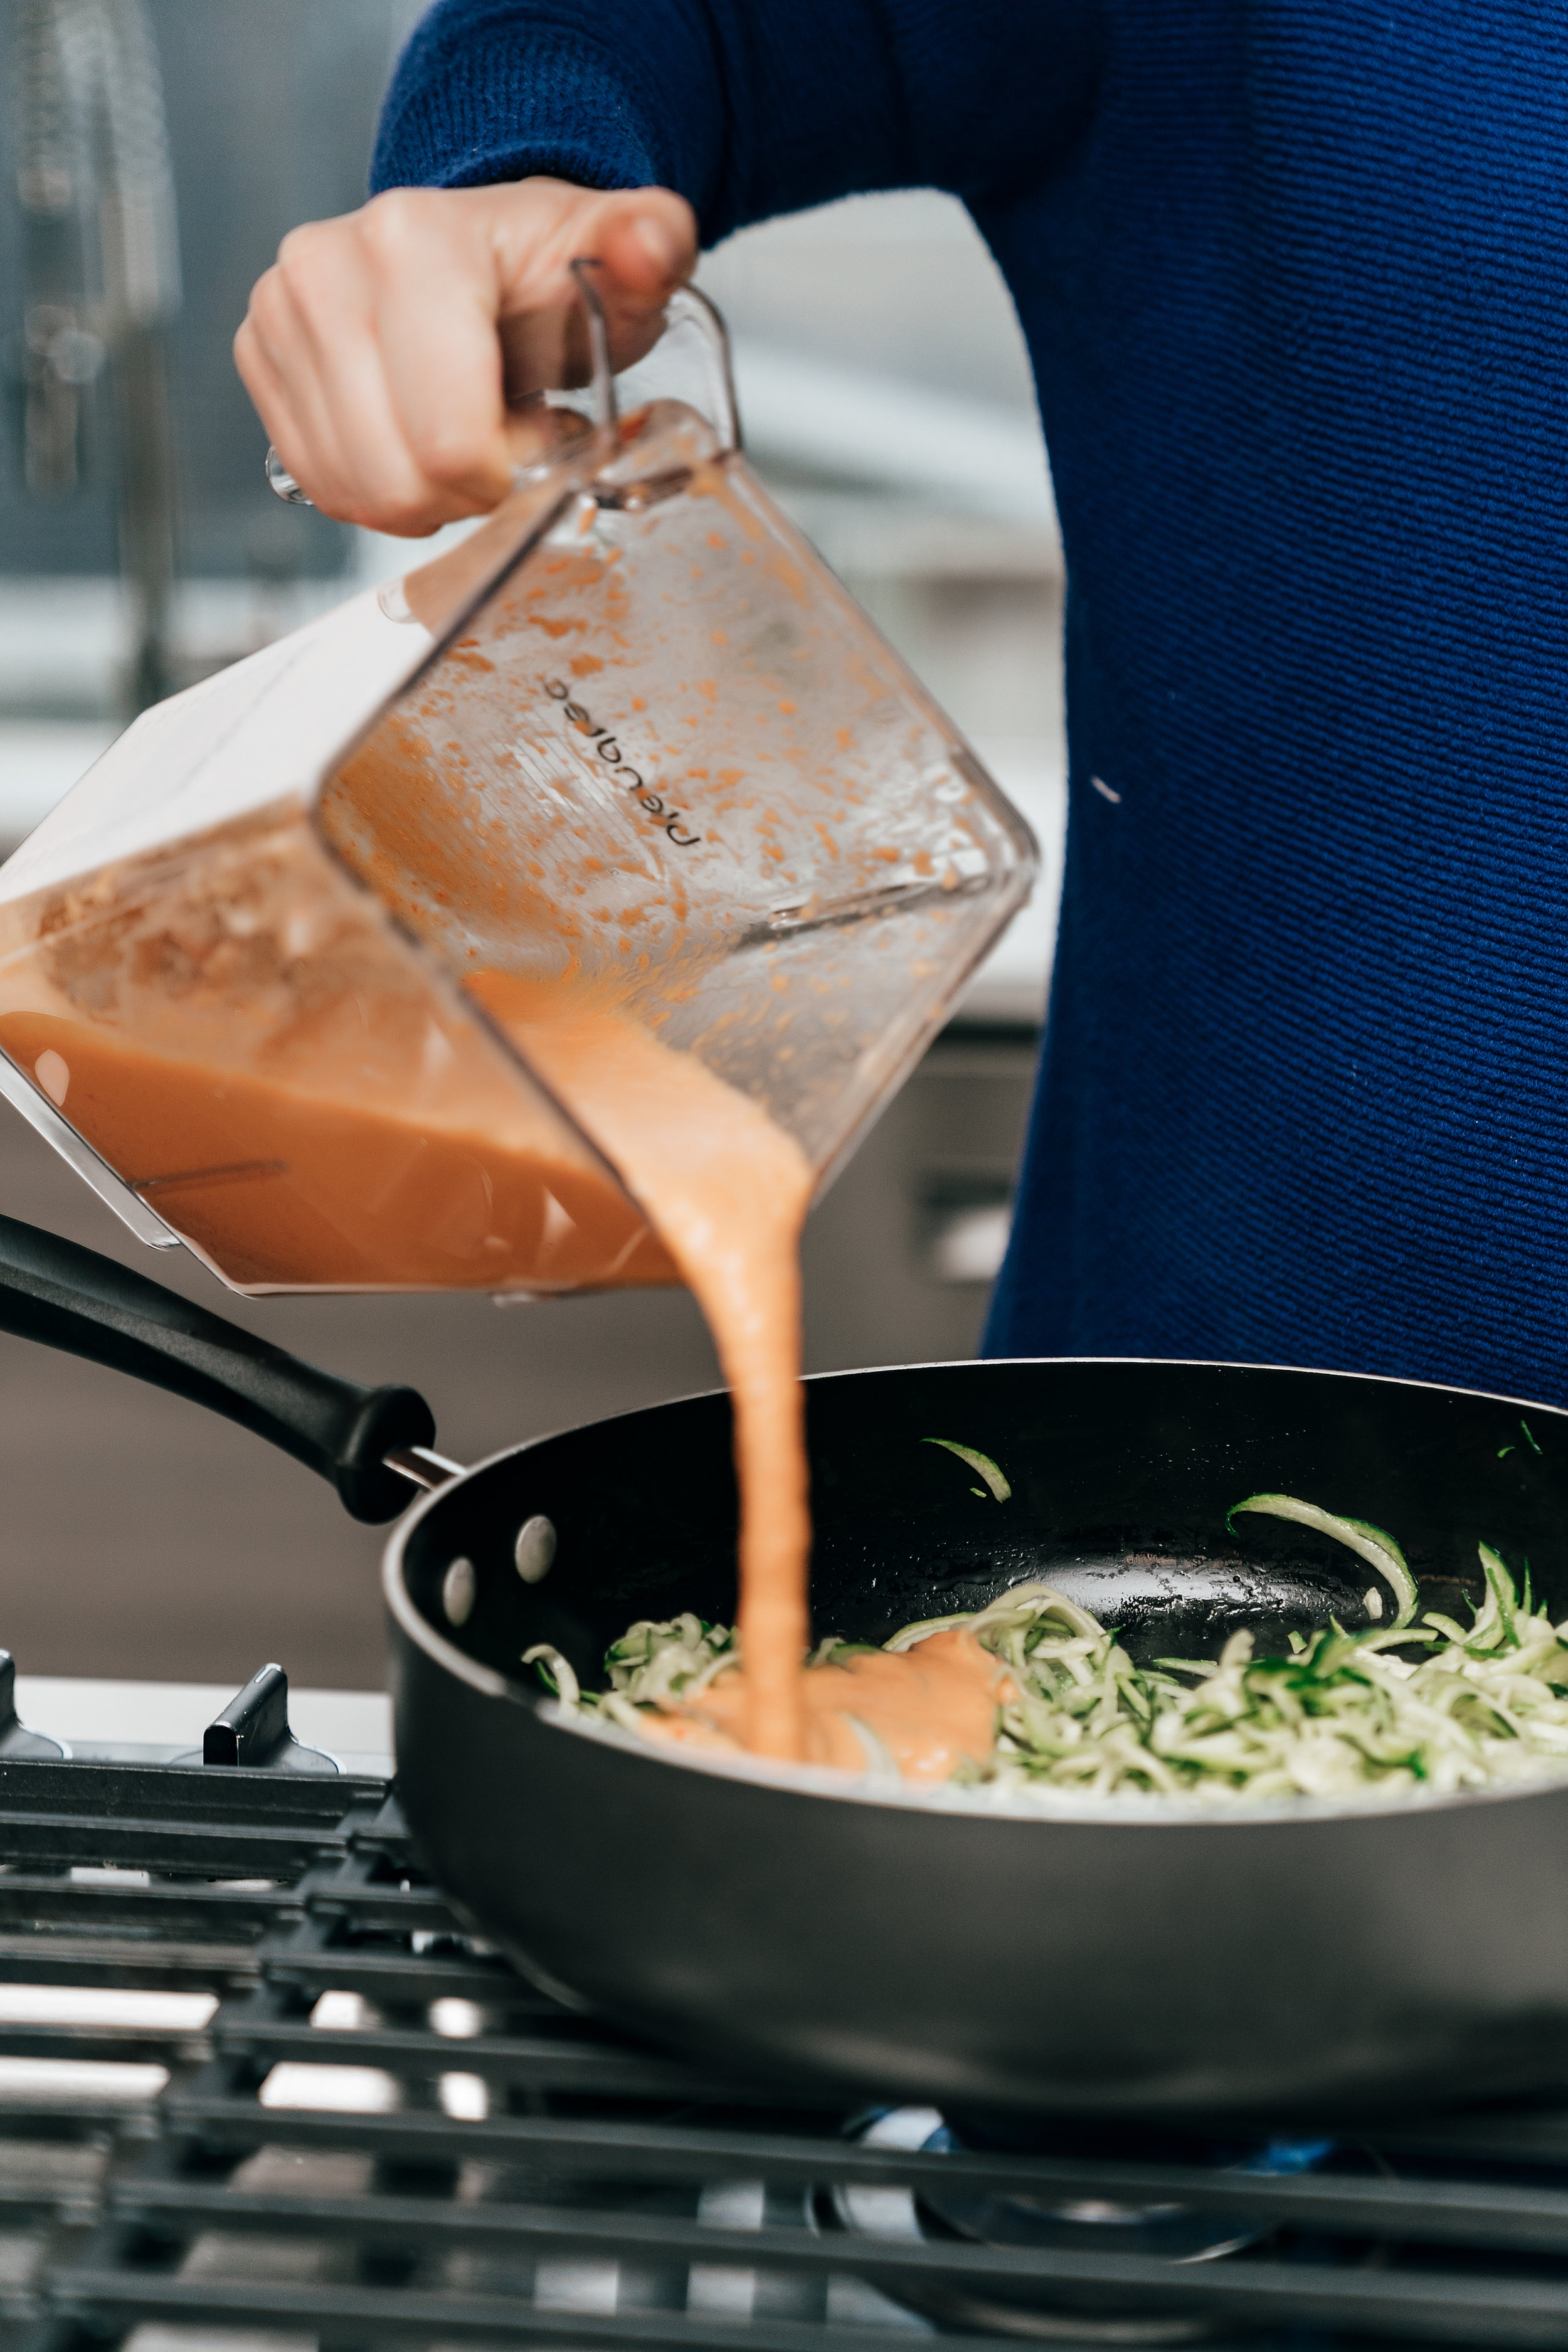
To start you blend up the sauce in a blender - so easy! Then you quick fry the tortillas. I like to use the uncooked tortillas and just cook them on the stove instead of actually frying them in oil! However, if you’re using regular store bought, pre-cooked tortillas, I would recommend quick frying them in oil to soften them up. Let the oil drain onto a paper towel .

Then mix up the chicken mixture, fill the tortillas, roll them up and place them in a pan with seam down. Pour the sauce on top, bake covered with foil, then remove foil, sprinkle cheese over, and place back in the oven until the cheese melts. Simple and easy. The full recipe is below!

Salty Blondes | Yummy Chicken Enchiladas

Yummy Chicken Enchiladas

Yield: 12
Author:
Prep time: Cook time: Total time:

Ingredients:

  • 1 16 oz can tomatoes
  • 1 4 oz can green chili peppers
  • 1/2 tsp coriander 
  • 1/2 tsp salt
  • 1 cup sour cream
  • 2 cups shredded cooked chicken
  • 1 8 oz package cream cheese
  • 1/4 cup finely chopped onion
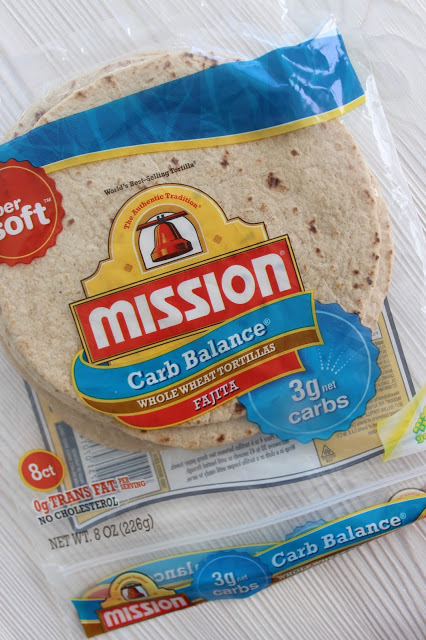
  • 12 flour tortillas
  • 1 cup shredded monterey jack cheese

Instructions:

How to cook Yummy Chicken Enchiladas

  1. Place tomatoes, peppers, coriander, and salt in blender and blend until smooth. Add sour cream and blend. 
  2. Mix together chicken, cream cheese, onion and 3/4 tsp salt.
  3. Quick fry tortillas in oil.  Fill tortillas with chicken mixture and roll up. Place in a baking dish and pour tomato mixture over top.
  4. Cover with foil and bake at 350 degrees for 30 minutes. 
  5. Remove foil and sprinkle with cheese - return to oven until cheese melts. 

We hope you love these as much as we do!

Salty Blondes | Yummy Chicken Enchiladas

White Chicken Chili Recipe

Well, we took these photos back in MARCH this last year, but it’s actually perfect that we never got around to posting this recipe, because what better time of year to make this yummy soup than FALL, am I right?!

Salty Blondes | White Chicken Chili

This white chicken chili is the all-time fall comfort food, with lots of good flavor, and a little spicy kick to it. This soup is also special to me, because it’s one of the meals my mom made for us when she came to stay with me after Cal was born. I remember coming home for a little break after a long day of being with Cal at the NICU to a sparkly clean house with dinner on the table - this chili with warm, homemade cornbread and her famous salad, and cream cheese brownies in the oven.

Having her here meant everything to me, and it’s something I’ll never get again. I’m so grateful for all that she taught me, and left here with us, including all her yummy recipes that are basically all I ever make for my own family.

Salty Blondes | White Chicken Chili

Okay and before I share this yummy recipe (scroll to the bottom to get straight to it), I wanted to share one of my favorite tips when cooking with a rotisserie chicken (or any raw meat, sticky doughs or messy crumbles that require you to use your hands) - DISPOSABLE GLOVES!

I can remember when I told my mom about this little trick and her response - “I’m totally going to start doing that now! You need to share that on your blog! That’s something people would like to know about.” Love her.

Salty Blondes | White Chicken Chili

I used to haaaaate working with a rotisserie chicken. I hated digging around the bone for the meat and I used to dread anytime I had to use one for cooking (I always use rotisserie chickens when a recipe calls for shredded chicken, i.e., enchiladas, soups, pastas). Since discovering using gloves for cooking, I now don’t mind it at al!

Salty Blondes | White Chicken Chili

Now, on to the recipe! I love this because it’s one of those crock pot recipes that you throw in early in the day and you don’t really have to worry about again until right before you eat! I won’t lie to you and say that it’s super healthy, but I also don’t think it’s the worst recipe out there for you. It’s hearty and warm and delicious and WORTH IT. Trust us.

Salty Blondes | White Chicken Chili

There are two ways to make this. Option one is if you’re making it for dinner and want it to be ready right away. Still super easy. Option two is if you want to throw it in the crockpot earlier in the day and have it ready at dinner time. That’s what I’ve always done to make this. Recipe is below. Enjoy!

Salty Blondes | White Chicken Chili

White Chicken Chili

Author:
prep time: cook time: total time:

ingredients:

  • 2 lbs. boneless, skinless chicken
  • 1 medium onion, chopped
  • 1 1/2 tsp. garlic powder or 2 cloves
  • 2 tsp. oil
  • 3 cans white beans, rinsed and drained
  • 1 can chicken broth
  • 2, 4oz. cans chopped green chilies
  • 1 tsp. salt
  • 1 tsp. ground cumin
  • 1 tsp. oregano
  • 1/2 tsp. black pepper
  • 1/4 tsp. cayenne pepper
  • 2 cups sour cream
  • 1 cup heavy whipping cream

instructions:

How to cook White Chicken Chili

  1. Option 1: Saute chicken, onion and garlic in the oil.  Add beans, broth, chilies and spices.  Bring to a boil. Reduce heat and simmer for 30 minutes. Remove from heat.  Add sour cream and whipping cream. 
  2. Option 2 (the easier way): Add chicken, onion, garlic, beans, chillies and spices to crock pot. Cook on low for 6-8 hours. Stir in sour cream and whipping cream before serving and allow to heat through for 30 minutes.

Protein Pancakes

When it comes to breakfast, I choose sweet over savory every time. Like, if I’m going out for breakfast I’m almost always struggling to choose between the pancakes, french toast, or waffles 🙈. I stuff my face with carbs, butter, and sugary syrup, then all I want to do after is go into a major food coma.

Salty Blondes | Protein Pancakes

Now, I’m not saying I will, or even want to, change my ways. I enjoy every second of those delicious carbs and I probably will always choose sweet, carby goodness over a veggie omelet. Luckily I don’t go out to breakfast all that often, and when I’m home I’m usually too lazy to make myself a big breakfast in the mornings. I do, however, still love a good pancake, and, fortunately, these protein pancakes are light, pretty healthy, and don’t leave me feeling like I need a nap immediately after I eat them. They’re also SO yummy and really easy to make. All you need is a list of simple, everyday ingredients and a blender!

Salty Blondes | Protein Pancakes

How cute is my little pancake flipper helper? 😍 There really are no fancy ingredients or directions for this recipe. You mix everything up in the blender, and pour the batter onto a griddle. Scroll down for the recipe. You can easily double, or even half it. They always turn out! P.S. I like to drench the griddle in butter when cooking these. Maybe that’s why they taste so good. Haha.

Salty Blondes | Protein Pancakes

Cottage Cheese Protein Pancakes

ingredients

Ingredients
  • 3 eggs
  • 1 Cup cottage cheese
  • 1 teaspoon vanilla
  • 2 Tablespoons honey or agave
  • 1/2 Cup flour
  • 1 teaspoon baking powder
  • 1/4 teaspoon salt

instructions

Directions
  1. Blend all ingredients up in a blender. Pour 1/4 cup of batter at a time onto a griddle.  Cook and serve warm.

Pin this post:

Salty Blondes | Protein Pancakes

Vegan Creamy Garlic Red Pepper Zoodles

A vegan recipe (minus the parmesan shavings topping) that’s easy to make and delicious! What more could you ask for? This recipe is a great side dish for dinner or light lunch or snack during the day! So yummy!

Salty Blondes | Vegan Zoodles

To make this recipe even easier, I buy the zoodles already spiralized at Harmon’s (get the big pack!), but the recipe calls for 4 zucchini :) We originally got it from Pinch of Yum!

Salty Blondes | Vegan Zoodles

The first time I made this recipe, the hardest part was peeling the skins off of the 3 roasted red peppers. I realized I hadn’t roasted them long enough because I was worried about burning them. But the second time was much easier! Roast each side under the broiler until they literally have black spots all over each side and they’ll be much easier to peel!

Salty Blondes | Vegan Zoodles

If you DO use the the pre made zoodles, you won’t need to use all of the sauce as the recipe makes too much for the zoodles. Just pour it over until they’re covered :)

Salty Blondes | Vegan Zoodles

Top this delicious dish with salt and pepper and whatever else sounds good! We used parmesan shavings, but goat cheese would be yummy too! If you want to keep it vegan, you could use spiced nuts or basil. The full recipe is below!

Salty Blondes | Vegan Zoodles
Yield: 4

Vegan Creamy Garlic Red Pepper Zoodles

Calories Per Serving: 198

ingredients:

Creamy Roasted Pepper Sauce
  • 3 red bell peppers
  • 1 cup almond milk (I prefer Almond Breeze Almondmilk Cashewmilk blend because it’s a little creamier than most)
  • 1 tablespoon olive oil
  • 1 teaspoon salt
  • 1 clove garlic
  • 1/4 cup tahini or almond butter for thickening
Zucchini Noodles
  • 1 tablespoon olive oil
  • 4 zucchini, ends cut off and spiralized or cut into ‘noodles’
  • salt to taste

instructions

Directions
  1. ROAST THE PEPPERS: Place the bell peppers on a foil lined baking sheet. Turn on the broiler and roast the peppers on the top level, close to the heating element. When black spots appear, turn the peppers and continue to roast until all sides have been blackened. Let cool and pull off blackened skins and remove ribs, seeds, and stem.
  2. MAKE THE SAUCE: Add the 3 roasted bell peppers to a blender with the rest of the sauce ingredients and blend until smooth.
  3. ZUCCHINI NOODLES: Heat a large skillet over medium high heat. When the skillet is hot, add the olive oil and onion – sauté for a minute or two until the onion is softened but not browned. Add the zucchini noodles to the skillet. Sauté using a pair of non-stick tongs to toss the noodles. Just as the zucchini noodles begin to soften, but before they start shedding water, sprinkle with salt and add the sauce and cook just until the sauce is heated. When in doubt, my leaning is to undercook these!
  4. SERVE: Adjust the salt to your taste, and serve immediately with any toppings you might like, such as: parsley, Parmesan, goat cheese, truffle oil, that sort of thing.

Pin this post:

Salty Blondes | Vegan Zoodles

Christmas Candies

Let’s be real…the holidays are crazy.

With all the hustle and bustle of Christmas shopping, squeezing in allll the holiday traditions, hosting get togethers and traveling to visit family, I know I can’t be the only one that starts to feel STRESSED midway through December.

Salty Blondes | Christmas Candies

One of the things I don’t stress about, though, is what to give for neighbor/friend/coworker gifts every year! I used to think I had to come up with something creative, or spend time in the store looking for something cute and perfect for each person individually, but the last couple of years I have been giving away the three treats I’m about to share. It’s so easy, and they are always a huge hit!

English Toffee

Salty Blondes | Christmas Candies

This is a recipe our cousins have been making for years around the holidays and, when I was younger, I always used to think it must be really difficult to make because of how yummy and delicious it tastes and looks! Our cousin, Maddie, shared the recipe on her blog, A Whisk of Thyme, last year, and I was blown away with how easy it was to make!! This toffee MELTS. IN. YOUR. MOUTH. I’m drooling just thinking about it 😂

I will say this recipe takes a little bit of trial and error to perfect, as easy as it is. The first time I made it, I cut the recipe in half and it actually turned out pretty perfect. The next TWO times, I made a full pan of it and under cooked it, so it turned out chewy (you’d think I would have learned after doing this once). Now I know just how long to cook it, and included some of my tips and tricks at the end of the recipe below!

The images above show the first couple of steps for prepping the pan before you begin cooking! Also, THIS little chopper is perfect for chopping the nuts. I use it for everything!

English Toffee

ingredients:

Ingredients
  • 3 sticks of butter
  • 1 1/2 cups brown sugar
  • 1 lb. chocolate rounds/wafers 
  • 1 cup finely chopped walnuts

instructions

Directions
  1. Grease a 9x13 glass pan with butter.  Sprinkle walnuts on top of the greased pan and press firmly. Place chocolate wafers on top of the walnuts in a single layer until the bottom the pan is covered.
  2. In a medium sized pot, combine brown sugar and butter together.  Cook over medium heat, stirring constantly. Toffee will be done once a candy thermometer reads 290°F (if you don't have a candy thermometer, see tips below for knowing when toffee is done).  Toffee will burn quickly if overcooked, and will be chewy if undercooked. 
  3. Once candy is done, immediately pour evenly over the prepared pan with the nuts and chocolate.
  4. Melt the remaining chocolate in the microwave (put in a microwave safe bowl and microwave on high for 30 seconds, then stir.  Microwave for another 15 seconds, stir, and repeat until fully melted).  Pour melted chocolate over top the candy and spread evenly.  Set aside for at least 5 hours or overnight.
  5. When ready, use a large knife to cut in to the toffee. It should break apart easily, and enjoy!

NOTES:

If you don't have a candy thermometer, here are a few tips to know when the candy is done! It may take a couple of times making this before you perfect it.
1. It should take at least 5-7 minutes after everything has melted. You will think it looks done, but keep stirring!
2. The toffee should be the color of the skin of an almond when it's done.
3. Keep a glass of cold water by your pan. When you think the toffee is close to being done, drop a small piece in the cold water.  If it hardens immediately, you know the toffee is done! If it's chewy, keep cooking!

Almond Brittle

Salty Blondes | Christmas Candies

This one came from my (Regan) mother-in-law and is my husband’s favorite! He asks me to make it all throughout the year, not just during Christmas time 😂 It’s another one that I was kind of surprised about when I found out how easy it was to make. It has the perfect amount of crunch and the flavor is almond, buttery amazingness. Once you start eating it, it’s hard to stop! Last year I grabbed some cute, large $5 mugs from Target that had different Christmas sayings on them, filled them with almond brittle, wrapped them up in celophane and tied a ribbon around the top to deliver to neighbors!

Use the photo above as a color guide to know what the almond brittle should look like when it’s done - I know “caramel color” is a little vague.

Almond Brittle

ingredients

Ingredients
  • 1 cup butter
  • 1 cup sugar
  • 2 Tbs. light corn syrup
  • 2 cups slivered almonds

instructions

Directions
  1. Boil all ingredients in frying pan until caramel color, stirring constantly.
  2. Pour onto foil and evenly with spatula.
  3. Break apart after cooled.

Rolo Pretzel Turles

Salty Blondes | Christmas Candies

The easiest of them all! It’s a little silly to even call this a recipe, because it’s literally three things you buy and put together with almost zero effort, but look how cute they are!! And they are addicting. Anyone else a huge fan of sweet + salty together?

Rolo Pretzel Turtles

ingredients:

Ingredients
  • 1 Package of unwrapped Rolos
  • Bag of mini pretzels
  • Pecans

instructions:

Directions
  1. Preheat oven to 350°
  2. Lay pecans out on a cookie sheet and toast for about 7-8 minutes, until they start to brown.  Remove from heat and set aside.
  3. Lay pretzels out on a cookie sheet and top each one with a Rolo. 
  4. Put in oven until Rolo starts to soften, about 2-3 minutes.  Remove from oven.
  5. Press a pecan into the top of each Rolo.

We hope these ideas take a bit of stress off your plate this holiday season, and allow you to spend a little extra time focusing on the reason for the season. Happy Holidays!!

Party Favorites

Fall is such a fun time of year. You’ve got the crisp fall air, colorful leaves, HALLOWEEN, it’s football season, and friends and family seem to gather together more often for festive parties or to watch games. It’s all the perfect transition into the holidays.

With all this going on, it’s always nice to have a couple of quick and delicious go-to snack foods or appetizers on hand that you know everyone will love, in case you have company over last minute or unexpectedly. This happened to me (Regan) the other day when my husband decided to invite some people over to watch a UFC fight at the last minute.

LUCKILY I had the recipes below that I knew everyone would enjoy, and didn’t have to panic trying to think of what food to have out for people to snack on.

You’re going to want to scroll through and save each of them, just trust us.

Salty Blondes - Party Favorites

Black Bean & Avocado Salsa

This salsa is unreal. The flavors come together perfectly to create a refreshing, yummy, HEALTHY salsa that’s also really filling, and sure to be a crowd pleaser.

Black Bean & Avocado Salsa

ingredients:

Ingredients
  • 19 oz black beans or more drained & rinsed

  • 11 oz corn kernels (drained)

  • 1 minced onion

  • 3 c salsa

  • 2 T fresh chopped cilantro

  • 1 T lemon juice

  • 2 T chili powder or less

  • 2 chopped avocados

instructions

Directions
  1. Mix and chill everything except avocados several hours before serving.  Add avocados and serve w/corn chip scoopers.  Need 2 bags of scooper chips.

Buffalo Chicken Dip

This one is from our aunt Wendy. If you know her, then you already know how good this is. If you’ve been to any of her amazing parties, then you’ve probably tried this. She always makes it, usually because someone always requests it when they know Wendy’s cooking. We asked her if we could #sharethegoodness and post it on our blog, and lucky for all of you, she said yes!!

Buffalo Chicken Dip

prep time: 5 minscook time: 40 minstotal time: 45 mins

ingredients:

Ingredients
  • 1 lb. shredded chicken breast
  • 2 (8 ounce) packages cream cheese, softened

  • 1 cup Ranch dressing

  • 3/4 cup pepper sauce (such as Frank's Red Hot®)

  • 1 1/2 cups shredded Cheddar cheese

  • 1 bunch celery, cleaned and cut into 4 inch pieces (for serving)

  • Club crackers (for serving)

instructions:

Directions
  1. Mix chicken and hot sauce together. You can heat it if you would like. Mix ranch with cream cheese. Put chicken mix and then ranch - cream cheese mix in a casserole or aluminum pan. Mix in half of the shredded cheese, Sprinkle the remaining cheese over the top, cover, and bake at 400 until until hot and bubbly. Serve with celery sticks and crackers.

Tropical Punch

This is also something that’s always served at any party our family’s having. It’s a concoction our grandpa created, and the flavors just go perfectly together. With a tiny bit of carbonation and plenty of sweetness AND tartness, this punch will quench your thirst every. single. time. It’s perfect for any time of the year - the flavors are great for summer, and the color is on POINT for a festive Halloween party. We’ve had it in a witch’s brew served over dry ice at one of ours before 👻

Yield: About 20

Tropical Punch

ingredients

Ingredients
  • 54 oz. carton of Kern's Mango Juice
  • 54 oz. carton of Kern's Guava Juice

  • 2 liter bottle of Squirt or Sprite/7UP

  • 46 oz. can of pineapple juice

  • 1 packet of Lemonade Crystal Light powder

  • Ice

instructions

Directions
  1. Add ice to a large punch bowl or beverage dispenser. Pour all ingredients in and mix. 

Serve these at any party and we PROMISE your guests will love you, and ask you for the recipes.

P.S. No, we did not plan to wear matching stripes while shooting these photos 🙄😂 but, nevertheless, we linked them both below! Haha

Pin this post:

Salty Blondes | Party Favorites: Black Bean Avocado Salsa, Buffalo Chicken Dip, Tropical Punch

DIY Acai Bowls

We recently made these for a bridal shower breakfast we hosted for our cousin, and they were a huge hit! We looked up the ingredients for one of our favorite local acai bowls, and tried to copy the recipe.  They turned out SO yummy, we knew we had to share!

_MG_4083.jpg

This was the first time we had ever made our own acai bowls, and they were super easy thanks to these yummy and convenient frozen acai packets we found at Costco 🙌🏻 

The little packets are individually frozen, and we found that each packet can make about enough for one and a half servings (depending on how much additional fruit you use).

We have a favorite spot to get acai bowls, and find ourselves there way too often spending half of our food budgets on a 16 ounce bowl of frozen amazingness. Making our own made us realize how over-priced the ones we were buying are 🙈 (BUT we will say the social aspect of still popping in to Ivie Juice Bar with friends and sitting around their cute tables still makes the $8 Beach Babe bowl totally worth it every once in a while). 

The best part is topping the acai bowls with granola, ALL the fresh fruit (we like strawberries, pineapple, and banana), lots of coconut flakes, and a little honey drizzled on top 👌🏻

Check out the simple recipe below and enjoy! 

How to Make the Perfect Acai Bowl

Pin this post:

How to Make the Perfect Acai Bowl at Home

Healthy Snacks - What I Eat Throughout The Day

Paige here! I've been meaning to do this post for a while. As I've talked about before, I gained a TON of weight during my pregnancy and really had to buckle down in order to lose it! I've touched on how I did it here and there, but I get asked about it all the time and wanted to do a post specifically about what I EAT during the day since that's the most important part of losing weight!

IMG_9707.jpg

I still ALWAYS start the day with our morning power smoothie. I make it for my husband and I every morning, and we both love it! It's a great way to get your greens in right at the start of the day, and it keeps you nice and full. 

After that, I eat healthy smaller meals throughout the day about every 3 hours. I don't eat lunch! So I'll do our smoothie around 7:30am, then snacks at about 10:30, 1:30, and 4:30. This not only helps speed up your metabolism since you're constantly burning off small meals, but it trains your brain not to get hungry! 

IMG_0571.JPG
Facetune_19-06-2018-13-17-06.JPG

The second meal I almost always have every day around 10:30/11am is a piece of Dave's bread (I get Powerseed) with half an avocado, an egg and cholula on top. It's SO yummy! The only time I don't have it is if I'm not going to be home and have to grab a snack that's easier to take on the go.

For my other two meals throughout the day I alternate between the four snacks below. Basically whichever one sounds the best! All super easy, healthy, and low maintenance! A great starting point when choosing snacks is to try to make sure you have: 1. A fruit or vegetable 2. A healthy grain 3. Protien

IMG_0583.JPG

This one is just baby carrots with hummus (I buy these little containers at Costco) and skinny girl popcorn! I like butter and sea salt flavor. Only 160 calories in the whole bag! Sometimes I'll switch out the popcorn for whole wheat pita bread and dip it in the hummus with the carrots!

IMG_0582.JPG
IMG_0584.JPG
IMG_0585.JPG

Ok this is another one of my absolute favorites! I turned Regan onto this one and she has it every day now. I get the spreadable Laughing Cow creamy spicy pepper jack cheese (only 35 calories) and spread it over a light or whole wheat English muffin. Top each side with a slice of turkey and you're done! So delicious. I try to eat it with some grapes or other fruit I have around too. 

IMG_0578.JPG

The snack above is a great option if you're going to be out and about for a few hours! Just an apple with a piece of cheese and almonds. Super easy and filling, and great to throw in your bag and eat on the go!

IMG_0580.JPG
IMG_0581.JPG

Another super yummy one! Light and fit vanilla greek yogurt with granola. The yogurt is only 80 calories with 12g of protein! I'll try to get in some sort of veggie with this one too. Either some roasted veggies I have in the fridge (I try to always make roasted broccoli or sweet potatoes at the beginning of the week to have in the fridge to use with snacks or dinner), cucumber slices or carrots!

Facetune_16-06-2018-07-44-42.jpg

For dinner, I just try to be smart about it and do something healthy whether we're going out or stay home and cook. I try to eat around 7:30 and not eat anything else the rest of the night! If I'm being really good I'll make our perfect chicken and have it with brown rice or quinoa and roasted veggies! Or our go to salad :)

IMG_0572.JPG

I hope this post was helpful and gives you some good, healthy ideas of things to eat throughout the day! I've linked anything you see in the post (like my absolute FAVORITE salt and pepper shakers pictured above and also on my Favorite Things post) below, and also throughout the post. Most of the food items you have to get at the grocery store, but some you can buy from Amazon so I've linked those too! Thanks for reading!

UPDATE: Below is one more healthy snack/meal idea that I've been loving it lately and wanted to add.

Salty Blondes | Paige's Healthy Snacks

Pin this post:

Copy of The Resourceful Chef.png

Sidney's Black Bean Veggie Burger + Fries

Eating burgers while getting bikini body ready? Yes please! Our clean eating health nut sister (Sidney) kindly made these for all of us for dinner the other night, and they were so yummy we had to post!

Now, as a disclaimer, are these burgers juicy, Smash Burger yummy? Not quite. BUT they are delicious for a healthy alternative, and super clean! Even Regan (Mrs. Junk Food Junky) downed the whole thing (after it was smothered in mayo and ketchup, haha)!

Sidney used multi-grain buns, and topped the burger with lettuce, tomato, and hummus. She served the burgers with watermelon and oil-free, oven-baked fries! Now these were actually SO delicious.  Like, "we'd take these over In-N-Out fries any day" kind of good. 

See the full recipes below! The original recipes are from Forks Over Knives and From My Bowl

Black Bean Veggie Burgers

1 cup cooked brown rice (we used this)

1 15-ounce can black beans

½ onion, diced

¼ cup corn

1 teaspoon cumin

1 teaspoon garlic powder

¼ teaspoon chili powder

¼ cup cornmeal

2 tablespoons salsa

Preheat oven to 350º F. Lay a piece of parchment paper on sheet pan.

Sweat the onion in a sauté pan. Sweat means the moisture comes from the veggies so no oil is needed. Just remember to keep a lid on the pan. If the onions do start to stick, add a little bit of water. When onions become translucent add corn and spices. Cook for a few more minutes.

Add cornmeal, salsa, veggies, and rice to bean bowl. Mix everything together so there is an even consistency. Feel free to do this with your hands. Then form mixture into patties. A good thickness is about ½ inch and I like to make mine around 3 inches in diameter.

Place patties onto parchment paper and bake for 15 minutes at 350ºF. Flip the patties and bake for another 15 minutes. Serve between two leaves of romaine lettuce with tomato, onion, ketchup, and mustard. Or try putting the burger on a bed of fresh spinach instead of the bun…. delicious!

Oil-Free Fries

2-4 Organic Russet Potatoes, depending on size

Seasonings of Choice + Salt

Silicone Mat on baking sheet (or parchment paper)

Preheat your oven to 425F. Scrub your Potatoes clean, and peel them if desired.

Chop your fries into any shape of your choice; wedges that are between 1/2″ and 3/4″ are recommended.

Toss your Fries into a large bowl, sprinkle with any Seasonings and Salt you desire, and stir well.

Place the Seasoned Fries onto a baking tray lined with a Silicone Mat, making sure they do not touch.

Bake for 35-40 minutes, or until golden brown and crispy. Serve as desired.

Hope you enjoy(the burgers, and your bikini bod for summer ;)

Pin this post:

Salty Blondes | Black Bean Burgers
Salty Blondes | Healthy Vegan Burgers

Fall Popcorn: White Chocolate and Caramel Corn

If you know us Salty Blondes well, then you KNOW all three of us love a good bowl of popcorn.  You can bet the very first thing each of us registered for when we got engaged was a popcorn popper.  

Our go-to is obviously freshly popped corn with a half a stick of butter and salt (obviously).  Sometimes we like to switch it up and, if we're feeling super UNhealthy, we go for the white chocolate or caramel corn.

WHITE CHOCOLATE POPCORN

This one is super easy.  

1. Pop your corn 

2. Pour about 2 tablespoons of melted butter over

3. Sprinkler with salt and mix

4. Melt about 1/4 cup of white chocolate chips

5. Drizzle melted white chocolate over top and mix

6. Add more salt if desired

Let the bowl sit out until the chocolate hardens or throw the bowl in the fridge for about 10 minutes.

Tip: the white chocolate chips melt best in a double boiler.  We don't have one, so we make our own by boiling a little bit of water in a pan, then setting a glass bowl with the chocolate chips on top, making sure the water isn't touching the bowl.  Stir continuously until melted.  See picture below :)

EASY CARAMEL CORN

1. Pop your corn

2. Melt 2 sticks of butter + 1/2 Cup of brown sugar + 8 large marshmallows or 1 Cup mini marshmallows in pan

3. Stir ingredients continuously until melted and bring to a boil. Boil for about a minute. Keep stirring.

4.  Pour over popcorn and mix

Note: our original recipe calls for one stick of butter, but Paige uses two, which makes it a little less sticky, but obviously more fattening.  At this point though, does that really matter? 

These are both so yummy and perfect to bag up and give out at a Halloween party or even to trick-or-treaters! Let us know what you think in the comments if you try either of these!

Fresh & Easy Summer Chicken Wraps

Regan here bringing you another one of my favorite quick, fresh, and easy go-to recipes!

When Cal was in the hospital one of my friends and neighbors (thanks Meg!) brought us these and they were so yummy! They tasted so fresh and healthy and were the perfect pick-me-up after a long day of sitting in the hospital. I asked her for the recipe and have been making them often ever since, but found a way to make them even a little bit healthier!

Here's the original recipe (this blog has a lot of other yummy-looking wrap recipes that I plan on trying!).  Really the only thing that wasn't super healthy was the chipotle dressing, so I subbed a couple of things and can't tell a bit of a difference! Find my version of the recipe below.

I like to make these at the beginning of the week (sometimes I'll even double the recipe), then throw together these wraps for easy, healthy lunches.

Fresh & Easy Summer Chicken Wraps

You'll need:

Tortillas (my friend brought us a package of those uncooked tortillas and I've used those every time I've made them)

Shredded Chicken (I buy a rotisserie chicken from Costco)

Island Lime Rice (recipe below)

Chipotle Ranch Dressing (recipe below)

Black Bean & Corn Salsa (recipe below)

ISLAND LIME RICE

1 C. Jasmine long-grain rice

1 C. cold water

½ C. chicken stock

1 T. butter

½ t. salt

¼ C. cilantro- chopped

2 T. lime juice

1. In a large sauce pan bring the water and chicken stock to a boil.

2. Add the rice, butter and salt.

3. Cover the pan and reduce the heat to low. Cook for 20 minutes.

4. When the rice is cooked, fluff then stir in the cilantro and lime juice. Mix well.

BLACK BEAN SALSA

1 Can black beans; drained and rinsed

1 C. frozen corn; thawed and drained

1 small or ½ large red pepper; diced

Zest of 1 lime

2 T. lime juice

3 T. cilantro; chopped

1 jalapeno; diced

1 t. salt

½ t. pepper

1. Mix all ingredients together to form the salsa.

CHIPOTLE RANCH DRESSING

1 pkg. Hidden Valley Ranch Dressing mix

1 C. plain Greek yogurt (I use low fat)

1 C. milk

1 Chipotle Pepper (or two if you like extra spicy like us) with 2 T. Adobo sauce (from 1 can of Chipotle Peppers packed in Adobo sauce. You can find these in the Mexican section at most supermarkets.)*

1. In a blender pour the milk and the ranch dressing powder. Mix on high until well blended.

2. Add the Greek yogurt. Blend on high again for a few seconds.

3. Add 1 chipotle pepper and 2 T. of Adobo sauce from the can. Blend again until the dressing comes together.

4. Allow to set up in the refrigerator for at least 30 minutes.

We kind of stuff ours and the tortillas we use aren't huge, so these look more like tacos than wraps but just go with it ;)

If you make these, let me know how you liked them in the comments below!

Pin this post:

Salty Blondes | Summer Chicken Wraps

Refreshing Summer Smoothie

Is there anything better than a cold, refreshing smoothie on a hot summer day? This orange vanilla smoothie has been mine and my husband's recent obsession! Whether I make it for us early for breakfast, or blend it up late at night when we're craving a treat, it always satisfies.  

At this point my snapchat friends are most definitely sick of hearing about this smoothie, but after many requests for the (very simple) recipe, I thought it was time to share!

Easiest recipe ever:

- 3-5 frozen clementines/cuties/tangerines

- 1/2 to a whole frozen banana

- 1 serving of vanilla greek yogurt

- Orange juice

- Splash of vanilla extract

We buy a bag of clementines usually from Costco and peel them all, then freeze them in a ziplock bag.  Same with the bananas :)

If you're feelin' healthy (AKA if you're like me and realize you haven't eaten a single vegetable and it's 10pm at night), add a giant handful of spinach to the recipe.  You can't taste it and it makes you feel....just really healthy and refreshed!

Now...give me one of these while laying out in the California sun on the beach and we're golden.

Sidney's Healthy Chocolate/Banana/Peanut Butter Ice Cream

Sid here. So, last month my team did a no-sweet November challenge and let me tell you, the struggle was real. The hardest part for me was overcoming my ice cream addiction. Unfortunately, my husband is equally if not more addicted to this heavenly stuff. Anyways, somehow I convinced him to go without it for the month of November with me because, you know, misery loves company.

To help us cope, I made up this healthy Chocolate/Banana/Peanut Butter "Ice Cream" recipe, and it's seriously so good! Couldn't have survived without it. 

It's super simple, and I want to share the recipe with all those who are also struggling with a deep love for ice cream...or simply want to be healthier :).  The key ingredient is the powdered peanut butter, and I recently discovered my new favorite brand for helping with portion control (I might be addicted to peanut better too)..crap! 

Crazy Richards 100% Natural Peanut Butter is my new go-to for smoothies, on top of toast, or just eating plain. I like to use the powdered peanut butter for smoothies or ice cream, and I love grabbing a single serving size packet of creamy peanut butter on the go when I'm in a hurry.  

All you do to make the ice cream is:

- add 1-2 frozen bananas to your blender

- pour in a packet or one serving size of powdered (or regular) peanut butter

- about a tablespoon of pure cocoa powder

-and 1-2 tablespoons of almond milk, depending on preferred consistency

Use the pulse setting on your blender to slowly pulse while stirring with a spatula until everything is mixed (see video below). And that's it!  Sometimes I'll put it in the freezer in a tupperware for a half hour or so if I'm doubling or tripling it to make the ice cream harder.  

Stay strong over the holidays people! You will NEVER regret choosing something healthy over something unhealthy. I feel dang good when I skip the sweets and go for nature's sugar instead ;) 

Sheet Pan Fajitas and Simple Guacamole

Well, hello! Regan here :) It's been a while since we've posted a recipe (or anything for that matter...whoops!).  Please forgive us!  

Today I'm sharing our sheet pan fajita recipe.  It's one of my favorite recipes because it's quick, easy, delicious and healthy!  My four favorite things in a recipe!  These fajitas are made in the oven and everything cooks together in one pan...genius!

Here are the simple step by step directions.  Scroll to the bottom for the full printable recipe!

Start by cutting up your peppers and onion.  Then thinly slice some chicken breasts. 

Then in a small bowl, stir together some olive oil and your spices!

Add your chicken and veggies to a bowl, then toss all together with the oil and spices mixture. 

Spread out evenly on a sheet pan, and throw it in the oven. 

While it's cooking, make your guacamole and prepare your toppings for the fajitas.  

This guacamole recipe (if you'd even call it that) is mine and my husband's go-to whenever we have company over (because who doesn't love quac, right??).  We always get compliments and it's literally the easiest to make.  

All you do is mash up your avocados, add a few spoonfuls of your favorite salsa, sprinkle over some garlic salt and a little pepper, and squeeze in a little lemon juice.  There aren't any measurements, so you kind of just have to keep tasting it until it's right.  

We recently discovered this salsa from Costco...and it's a game changer.  We've been using this as the salsa for the guacamole, and it's seriously SO good.  My brothers were over the other day and said it was the best guac they've ever had.  Exaggeration?  I don't think so ;)

After about 25 minutes, your chicken and veggies should be cooked through and smelling delicious.  

Serve with guacamole, sour cream, cilantro, cheese, and whatever other toppings you want.

And indulge...without feeling guilty because it's heathy!

Side note...I found these whole wheat tortillas at the store, and they were perfect for these fajitas!  Full recipe below.  Enjoy!

Pin this post:

Salty Blondes | Sheet Pan Fajitas


Sidney's Philosophy

Sidney here! I'll be sharing some healthy recipes/quick and easy food prep tips over the next several weeks on here and on our Instagram. But first I wanted to just share a little about what my diet consists of and why. My philosophy is simple, I believe in eating a whole food, plant-based diet. Lots of:

Starches.

Fruits.

Veggies.

I believe that one of the keys to good health is eating as much REAL food as possible, the less processed the better! As a student-athlete, I am really busy and I have had to find ways to make healthy, good tasting meals that are quick and easy, for example, THINK FOODS LIKE:

Cold Cereal with Fruit.

Oatmeal.

Pancakes with Fruit.

(whole wheat, buckwheat, potato, etc.)

Vegetable and Bean Soups.

Potatoes.

(boiled, mashed, baked, steamed, etc.) (Sweet, Idaho, russet, Yukon gold, etc.)

Breads.

(whole grain wheat, rye, etc.)


Pastas. 

(wheat, buckwheat, brown rice, etc.) 

Lasagna.

(whole wheat, vegetables, tomato sauce, etc.) 

Pizza.

(whole wheat, vegetables, tomato sauce, etc.) 

Rice & Vegetable Dishes.

Beans, Rice, and Corn

Get Creative! Corn tortillas baked into chips!

Most grocery stores now have fresh, pre-cut veggies which make things way easier! You can just throw the veggies in a pan with some spices (I love Mrs. Dash) and cover for 5 minutes, add some canned beans and you've got a fast, tasty dish! I personally use onions (which create their own moisture) as the "oil" or a little balsamic vinegar and try to limit using oils. 

P.S. My favorite pans to cook with are these white ceramic pans. My sisters and I recently started using them when our grandmother got us each a couple of them, after she starting hearing that Teflon, or regular nonstick pans, are not good for you. Now, we aren't sure how true that theory is, but we do love using our new ceramic pans! They work really well and are much prettier than regular nonstick pans too ;)

Okay, now, meat. I personally don't eat a lot of meat, mostly because I ate a lot of crazy stuff while living in Indonesia and it kind of turned me off of it, haha. However, I think meat (preferably hormone and antibiotic free/grass fed) in moderation is fine. I don't think you need to eat it everyday, but eating it in moderation is perfectly okay (in my opinion). I also generally stay away from dairy because it isn't the best thing for me as a runner. It has been said that it encourages lactic acid build up in the muscles. 

I also believe that moderation in everything is key! Yes, I love veggies, but I also will eat ice cream, go out for pizza, and have midnight pancake parties with my roommates. It's all about balance and having good daily habits of eating healthy, allow for some not so healthy stuff every once and a while. 

Over the next several weeks I will be posting lots of quick, healthy recipes that actually taste good on Instagram so stay tuned!

Apple Crisp

 It's been a while since we've shared a new recipe on here!  This one's another family favorite and is SO easy! Every single time we make it we get asked for the recipe, and it's almost embarrassing how simple it is.  And it's perfect for Thanksgiving if you're looking for a dessert for the non pie lovers (they do exist, believe it or not!). 

All you need are a few ingredients that you should already have on hand (except for maybe the apples). Get the full, printable recipe linked at the bottom of this post!

Start by buttering the sides and bottom of a 9x13 pan, then slice your apples into the pan. To make your life even easier, peel and slice your apples with one of these babies. Trust us, you'll want to invest in an apple peeler if you don't already have one ;) Occasionally squeeze lemon juice over the apples to add tartness and prevent browning.  We like lots of lemon juice!

Next, sprinkle the spices over your apples.  The spices are measured out in the recipe, but really you can just sprinkle as much on as you'd like. You really can't mess this recipe up!

Then mix your sugary, buttery, crumble mixture up for the topping.  We like to just use our hands to incorporate the butter. (Promise we wash them first! ;)

Sprinkle the mixture over the apples, then throw in the oven (350) for about an hour!

Serve warm with ice cream....and try not to eat the entire pan. {P.S. leftover apple crisp for breakfast the next morning is totally acceptable}

Morning Power Smoothie

Hey guys! Paige here…just wanted to give you all a little "bump-date" and share a new favorite recipe! 

SO by week 24 of my pregnancy I had already gained 33 pounds and was really starting to stress out (average weight gain for most pregnancies is 25-35 pounds, and I still had over 3 months to go)! I was constantly hungry and my eating was pretty out of control, so I decided to turn to my own personal fitness guru/sister Sidney! I wanted help getting on a nutrition plan that would help get my weight under control, but also make sure I was getting all of the nutrients I need during pregnancy. She helped me come up with one and did not disappoint! 

Last week was my first week on the plan, and I actually LOST 3 pounds. Woohoo! I'm constantly eating HEALTHY foods so I never feel hungry, and I have much more energy throughout the day. 

My favorite thing on the plan is my morning smoothie! It's SO good and I crave it as soon as I wake up :) I'll be sharing more of my new eating plan soon, but today I want to share the recipe for this amazing smoothie that's so healthy and yummy!

What MAKES this smoothie is this amazing protein powder. It's SO good and only has 50 calories, AND 100 milligrams of caffeine :) It'll definitely wake ya up in the morning, and I love it! Click on the linked picture below to purchase.

The recipe also calls for flax and chia seeds (both optional). Below is the brand I use :)

When making this smoothie, I use a large handful of frozen spinach and kale. I buy the brand below at the grocery store, and just stick it in the freezer!

Below is the recipe. It makes enough for two and I make it for my husband and myself every morning. If you're making for one, cut everything in half!

Morning Power Smoothie:

1 Banana

1 handful frozen spinach

1 handful frozen kale

2 scoops

Mocha Cappuccino Protein Energy

1 Spoonful

Flax Seeds

1 Spoonful

Chia Seeds

1 Spoonful Almond Butter

2 Cups Frozen Blueberries

2 Cups Almond Milk (I use unsweetened vanilla)

Pin this post:

Light & Fit Salmon BLT

This is a recipe we got out of Paige's Cooking Light cook book, and can we just say, it's SO delicious! (Especially the sauce :) Paige's Mother-in-law gave her this cookbook, and we highly recommend it. It has so many great recipes, all healthy and low in calories!

This open-faced salmon BLT has been one of our favorites from it so far. It only has 330 calories, and has 25 grams of protein! Here's how to make it:

Prep time: 5 minutes, Cook time: 10 minutes

Ingredients:

-8 slices precooked hickory-smoked bacon

-2 (6 ounce) salmon fillets (about 1 inch thick)

-1/4 teaspoon freshly ground black pepper, divided

-Cooking spray

-1/4 cup light mayonnaise

-1 1/2 tablespoons fresh lemon juice

-1 1/2 teaspoons minted fresh dill

-4 (1 ounce) slices diagonally cut French bread, toasted

-4 green leaf lettuce leaves

-4 slices tomato, cut in half

1. Preheat broiler.

2. Cook bacon as desired or according to package directions (we make it on the stove).

3. While bacon cooks, sprinkle fish with 1/8 teaspoon pepper. Place fish, skin sides down, on a broiler pan coated with cooking spray. Broil 10 to 13 minutes or until fish flakes easily when tested with a fork. Remove skin from fish, and cut fish into chunks.

4. While fish cooks, combine mayonnaise, lemon juice, dill, and remaining 1/8 teaspoon pepper. Spread 1 tablespoon dill mayonnaise on each French bread slice; top with 1 lettuce leaf, 2 tomato halves, 2 slices bacon, and one-fourth of salmon chunks. Drizzle remaining dill mayonnaise evenly over each sandwich.

Click Here for Printable Recipe

Enjoy!

Sidney's Skinny Omelet

As we've mentioned before, Sidney is somewhat of a clean-eating fitness guru. Today we're sharing one her favorite healthy recipes. It's SO healthy, and DELICIOUS you won't believe it.

This omelet is also super easy to make…and don't worry about that fancy omelet flipping skill you see in restaurants! 

To make it, you only need a few simple ingredients.

We like to buy three large peppers and chop them all up. You can keep the chopped up peppers in a bag in the fridge, and use them to make this recipe throughout the week!

To make the omelet, start by whisking together three egg whites and one egg yolk, and a little salt, pepper, & any spices you choose. Set aside and turn oven to broil.

 Then add a little butter or olive oil to your pan, and sauté your peppers (or vegetables of choice) for a few minutes. Add some spinach and sauté until it begins to wilt. 

Pour your egg mixture over the vegetables, and use a spatula to pull the center toward the edges to create even cooking (see video below). Cook over medium/high heat for a few minutes. 

Then stick your pan under the broiler, and let the top of the omelet cook until done. Add some Cholula hot sauce for a little kick and viola! 

Check out the video below for a quick tutorial on how to do this.

Enjoy!